
You are currently browsing the tag archive for the ‘Camtasia Recorder’ tag.
Challenge of the moment was to put together a video and although I’ve played around with videos I haven’t particularly had too much experience of having to create and edit a video. So I thought it would be interesting to blog about the tools I’ve been using, how I’ve found them and what some of the challenges were. One of the principles was to see what I could do with the standard office-type tools I had, what was available free on the web or downloadable.
Assembling the stuff
The starting point was to pull together some content from a variety of different sources, mainly videos and images. For the videos one of the challenges was to get hold of copies of the videos so they could be edited locally. One of the useful tools was KeepVid, this tool lets you download streaming video from some locations such as 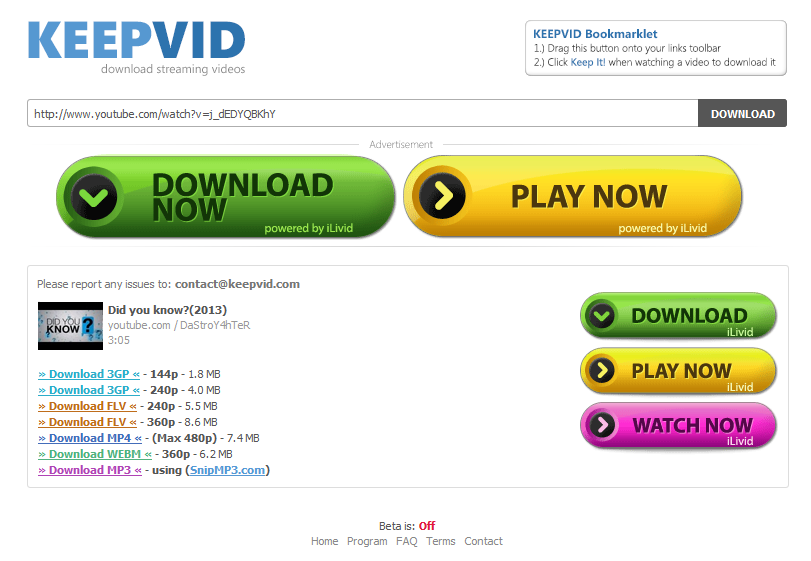 YouTube. The first few times I tried to use it I ended up downloading iLivid until I worked out to ignore the big coloured buttons as they were adverts that presumably are paying for the tool to be free. But once I’d worked out that all I needed to do was to paste in the URL and click the Grey download it worked really well and gives you a choice of several video formats. I chose MP4 and saved the video locally. (I don’t know why but Firefox always annoys me in not letting me choose where to save a downloaded file and just putting it in the download folder where I have to move it).
KeepVid supports quite a range of streaming sites. The FAQ lists
FAQ
Which websites does KeepVid support?
Dailymotion, 4shared, 5min, 9you, AlterVideo.net, Aniboom, blip.tv, Break, Clipfish.de, Clipser, Clip.vn, CollegeHumor, Cracked, Current, dekhona.com, DivxStage.eu, eHow, eBaumsWorld, Ensonhaber, Facebook, Flickr, Flukiest, FunnyJunk, FunnyOrDie, FunnyPlace.org, Metacafe, MySpace, Ning, Photobucket, RuTube, SoundCloud, Stagevu, TED, Tudou, TwitVid, VBOX7, videobb, VideoWeed.es, Veoh, Vimeo, zShare.net
Some videos couldn’t be downloaded using KeepVid so after looking around at options I went with using Camtasia Recorder 8 from TechSmith. This has a 30 day free trial which is enough time to play around with it and test it out. Camtasia is screen recording software designed for screen capture and quite commonly used for creating learning activities so it was something I’d come across before. 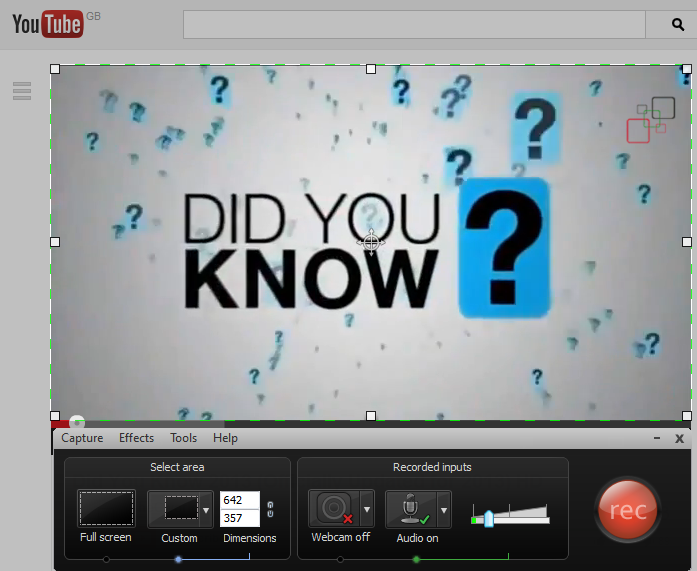 One of the things that Camtasia allows you to do is to capture activites on a screen, typically you might record an activity of navigating around a website. But for my purposes I’ve used it to capture a video playing on the screen. Camtasia lets you select an area of the screen and also adjust the sound levels. [Note: The sound levels are really important when it comes to editing your final video.]
I’ve also made use of Powerpoint as a means of creating some images to use between videos and images to try to tell a story and set some context from one sequence to the next.
Having created the slides I’ve then just used Jing (again from TechSmith) to screencapture each slide to turn them into .PNG image files to use in the video. I could have used any of a number of different tools, but Jing is one I use all the time. It just sits at the top of my desktop and I regularly use it whenever I want to grab bits of an image and just save it to use elsewhere. So I use it all the time for images for this blog for example. It’s simple to just select an area of the screen and capture that as an image. Often I’ll use Jing in combination with something like Paint.net to select an image and then resize or crop it. Pretty basic stuff but it just gives me enough flexibility to tweak things without going to a more sophisticated and complicated tool.
Editing the stuff
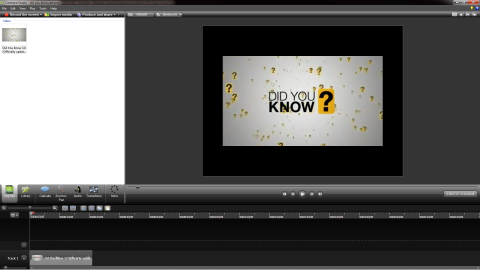 Having assembled much of the raw materials and worked out a rough storyboard based on the original idea for the video I’ve then gone back to Camtasia, this time Camtasia Studio 8 (with my 30 day free trial) to edit the video. One of the features of Camtasia Studio is that you can use it to edit your video extracts to just the clips that you want. It’s a pretty powerful tool and I’m only scratching the surface of its functionality. In retrospect and looking at the features I’m pretty sure that I could have actually used Camtasia Studio for much of the video editing stage in its entirety.
But I’d already started playing with another tool to build my video. I’d started playing with Windows Movie Maker as the tool to build the video. Windows Movie Maker is available as a free download as part of Windows Essentials 2012 from Microsoft for Windows 7 and Windows 8. 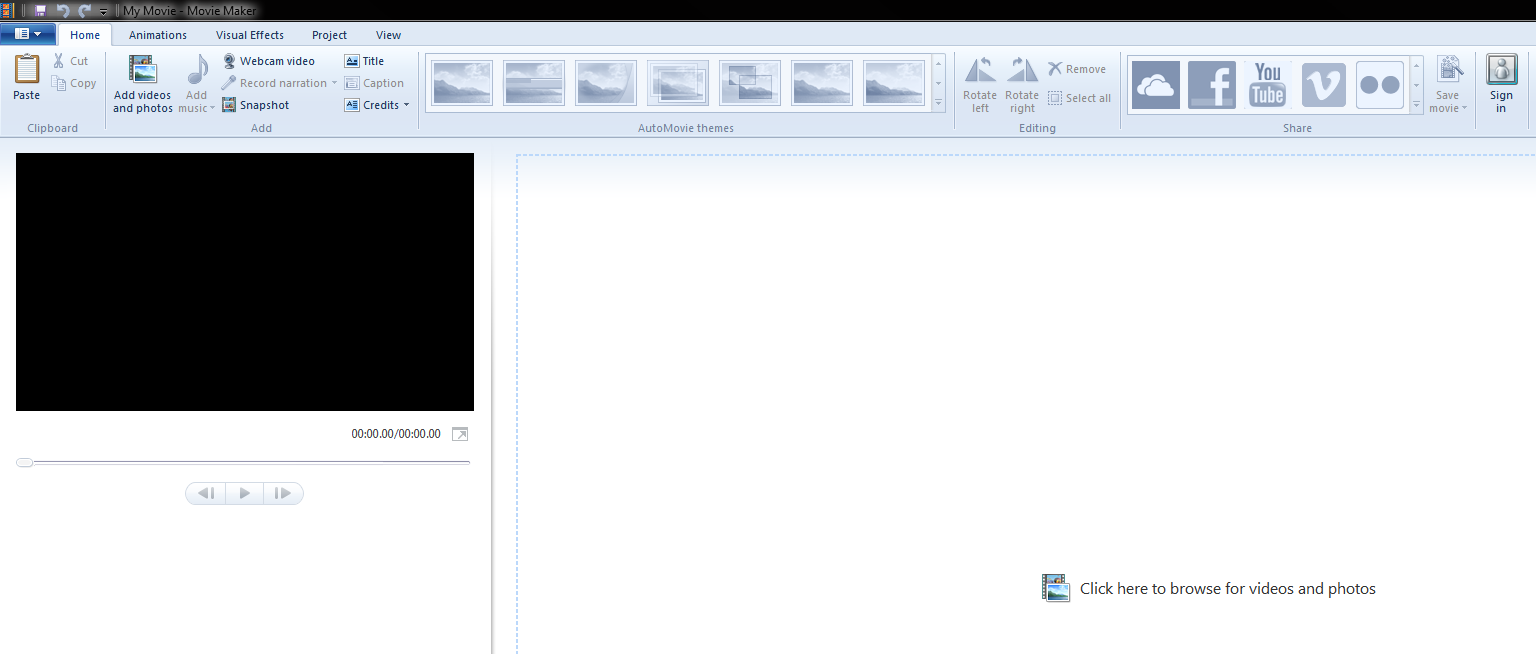 I’d not used it at all before and I must admit that it was pretty straightforward to assemble a collection of clips and images together into a video to tell a story. It lets you edit your clips together and shows them as a succession of elements, very much like a film. It’s even got a little skeuomorphic trick of showing the top and bottom film guide holes at the start and end of each of your clips.
  (Incidentally I notice this week news that skeuomorphism is out for Apple’s new iOS 7). It’s interesting that Windows Movie Maker also uses a film icon for each of your projects.
It’s quite a simple to use but a surprisingly powerful tool. It’s easy to add videos and images, you can add sound tracks or music and fine tune the length that still images will be shown on screen. You can use a number of transition tools to manage the changeover from one screen to the next and achieve some almost cinematic effects (with the temptation to do far too much). You can also adjust your music track to fit your video and fade in and out. There are also scrolling titles and credits features where you can determine how your closing credits will appear (or replicate the sci-fi big block of text scrolling up the screen and disappearing off into the distance … I resisted the temptation!).
There is also quite a good set of tools for uploading to several video sharing sites or packaging your video for use, although if you just want to save as a video file then MP4 or Windows Media file formats seem to be the main options. But overall really impressed with the ease of use of the tool.
Reflections
Easier than I thought it might be to get something that looks OK. Has a sequence of video and still images cut together with reasonable transitions, start and end titles and a mix of overlaying music. Impressed at the range of tools that are out there that are essentially free (once you’ve invested in a reasonable spec PC, Windows 7, MS Office, fast internet access – so there’s a barrier at that level). Camtasia is something to follow up and learn more about. You can go quite a long way with tools that are easily avaialble without spending a lot of money on a high-specification tool.
Saving the file to create your final output takes some time, even on a pretty good specification laptop. And file sizes are large (150mb for something around 8 minutes). But maybe 150mb isn’t a large file now when 1tb external drives are pretty cheap. Editing the audio and particularly getting the sound levels right is something that is quite challenging. Where you’ve a mix of videos with the sound tracks already on them then it isn’t so straightforward to get everything at the right level so a better sound-editing tool might have been good. But how easy it would be to extract all the sound and re-record it I’m not sure. Something else to learn.
But a good learning opportunity and interesting to work through what you can do.

